Converting DJI Goggles 3 for extreme astigmatism and myopia on a budget

My current project is to make optical inserts from an old pair of glasses.
The Goggles 3 have the best implemented vision correction I’ve seen, but for my old peepers it still isn’t enough.

I started with a load of calculations to determine feasibility.
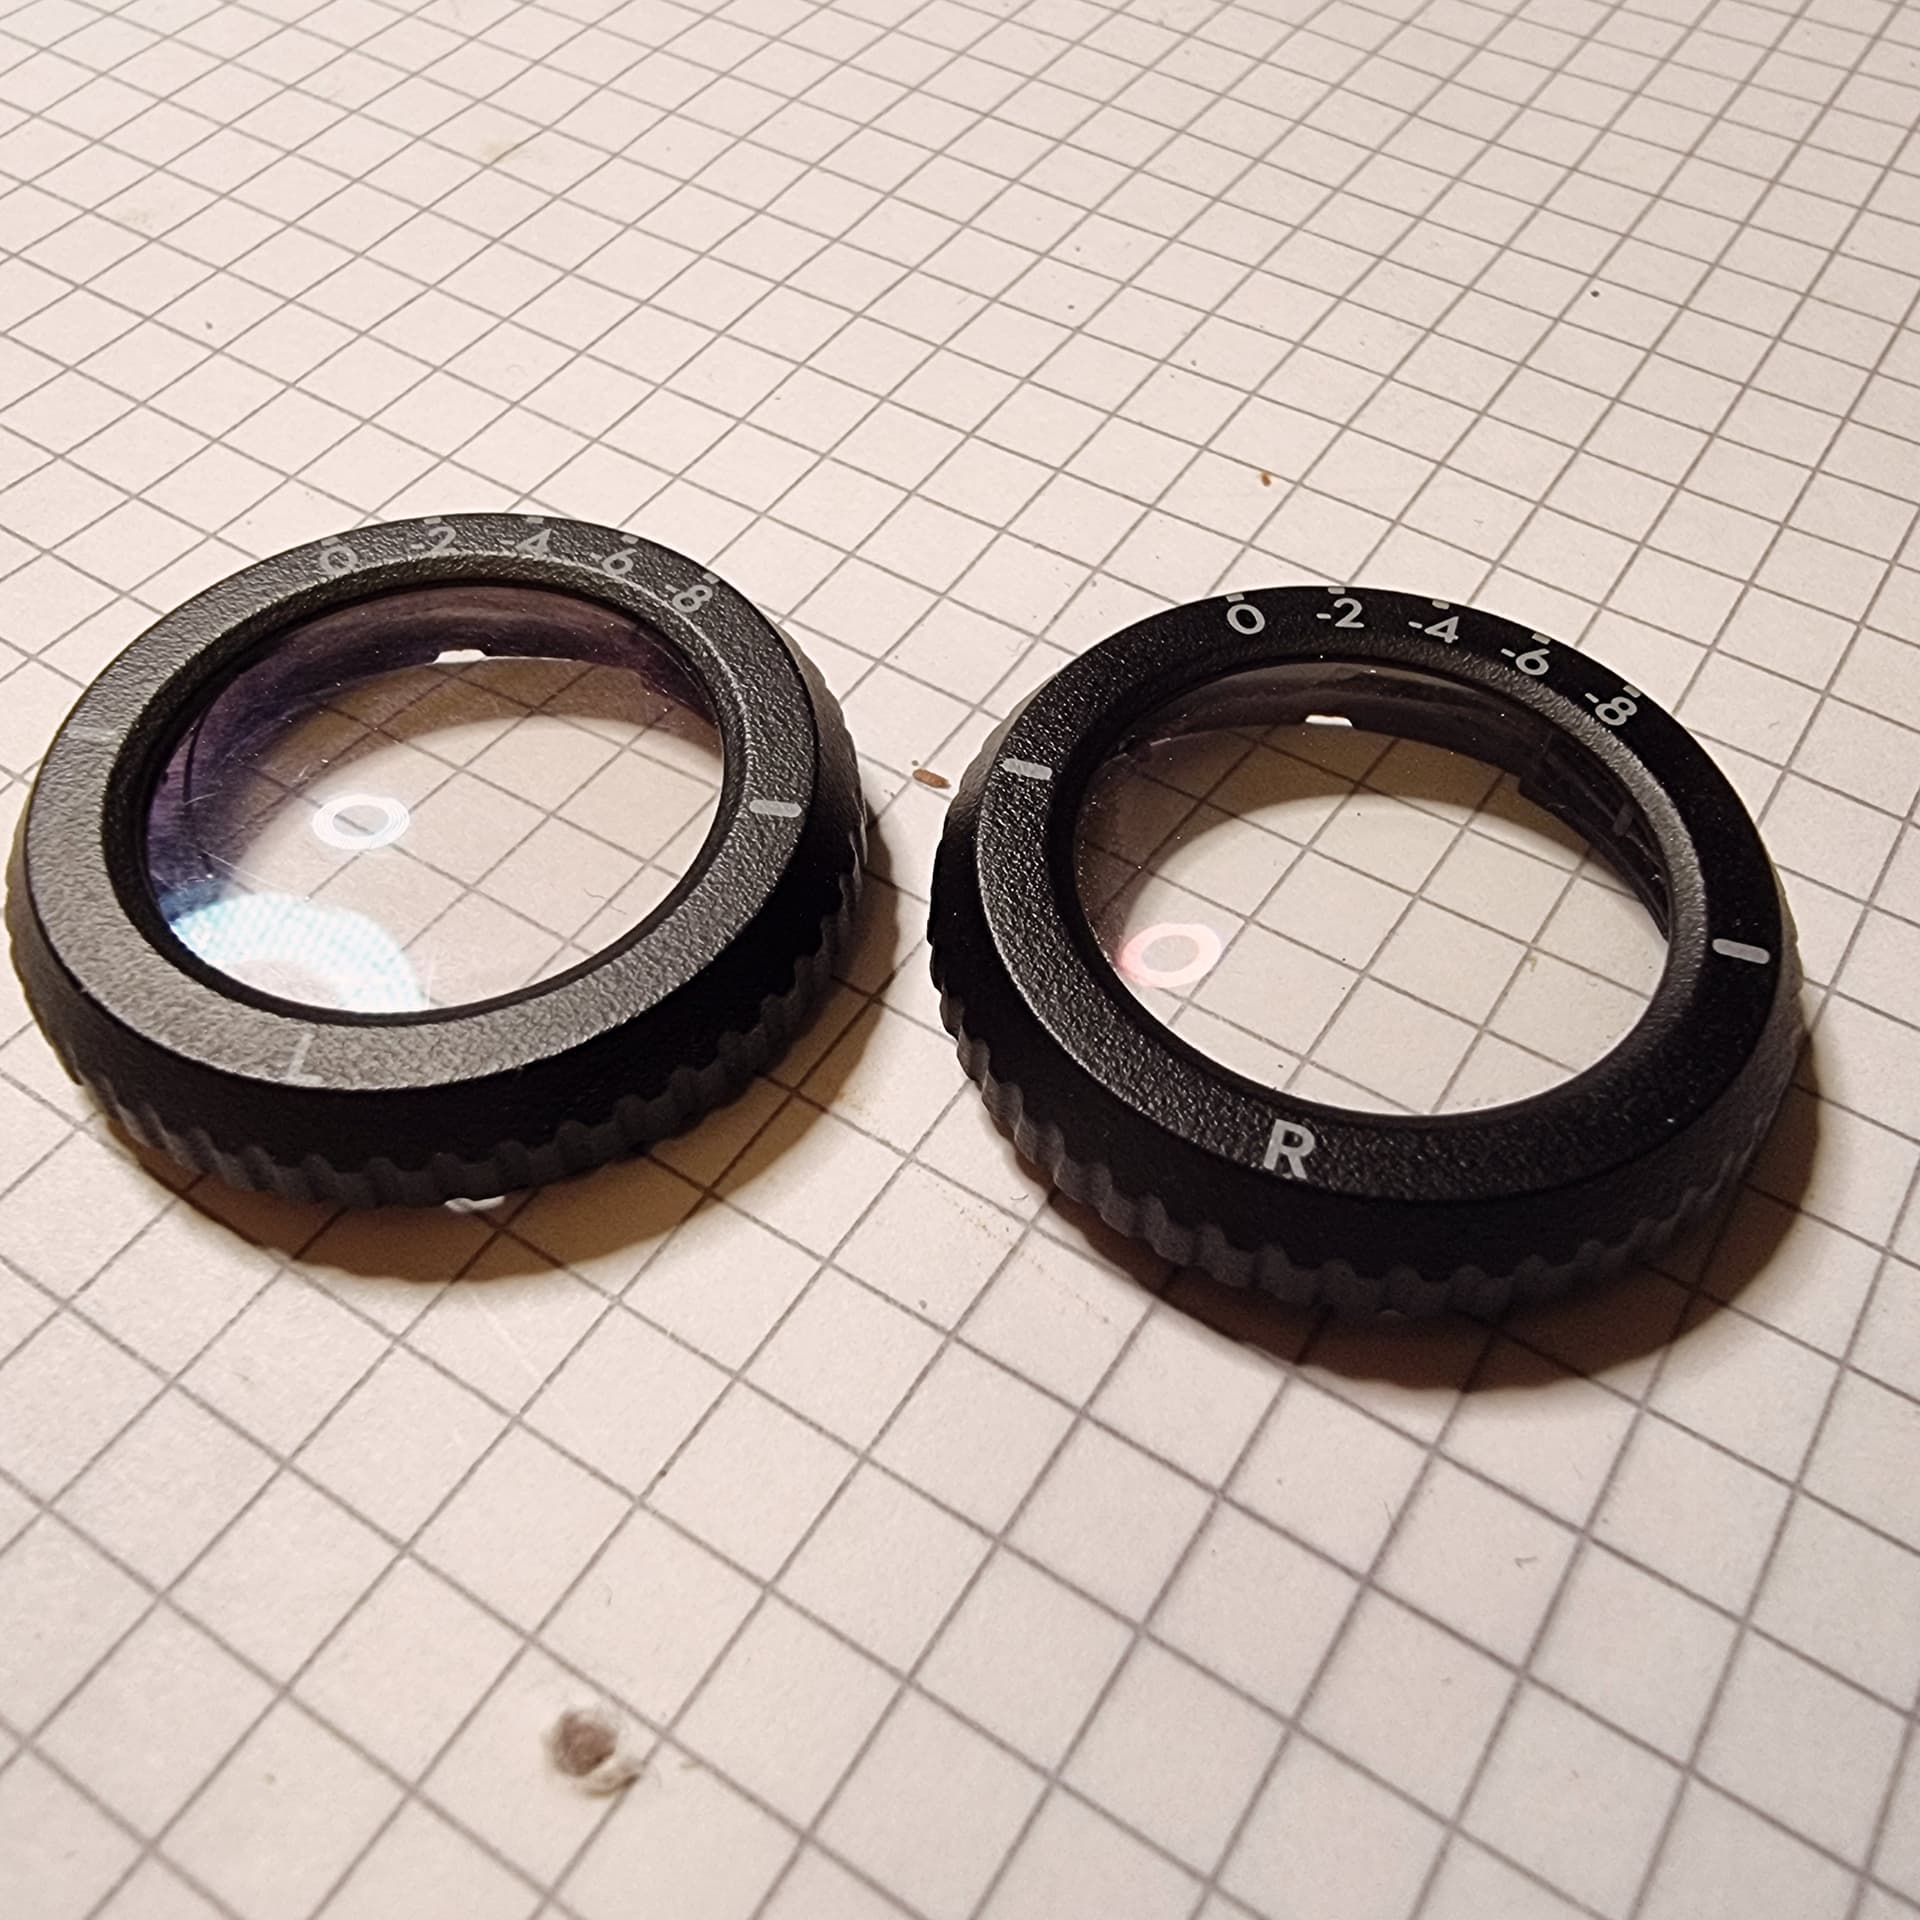
The DJI frame is made for lenses up to 1.8mm thick.
If the lenses in those glasses were trimmed down to a 25mm diameter, what would be the edge thickness?
They’re currently a staggering 8.3mm, but myopia lenses get thinner towards the middle. The LLM says we’re unlikely to get below 4.5mm.
We’ll cross that bridge when we get to it.

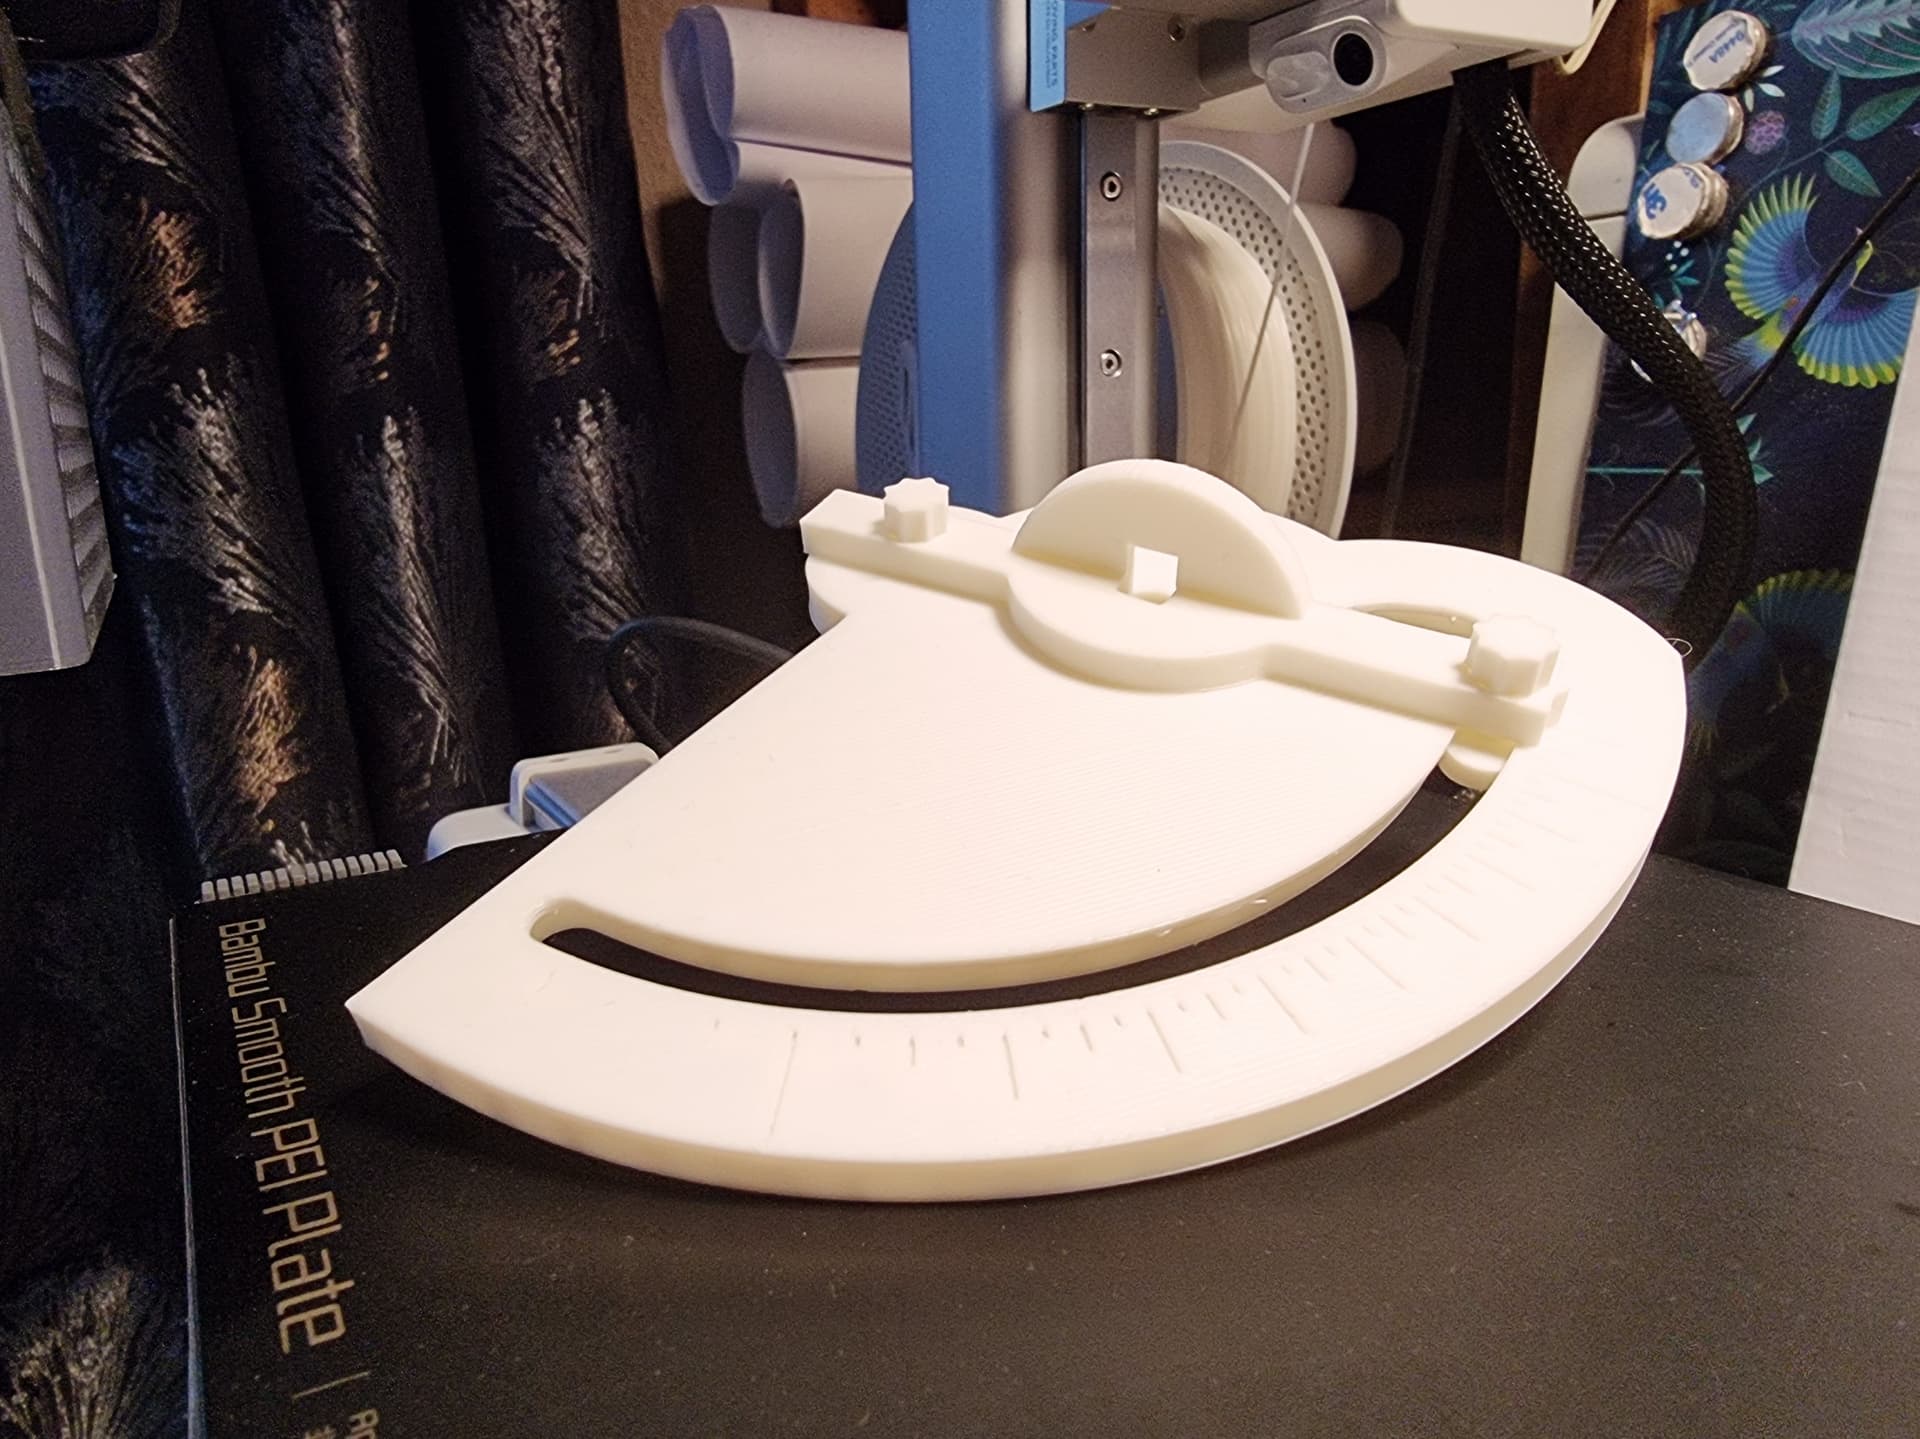
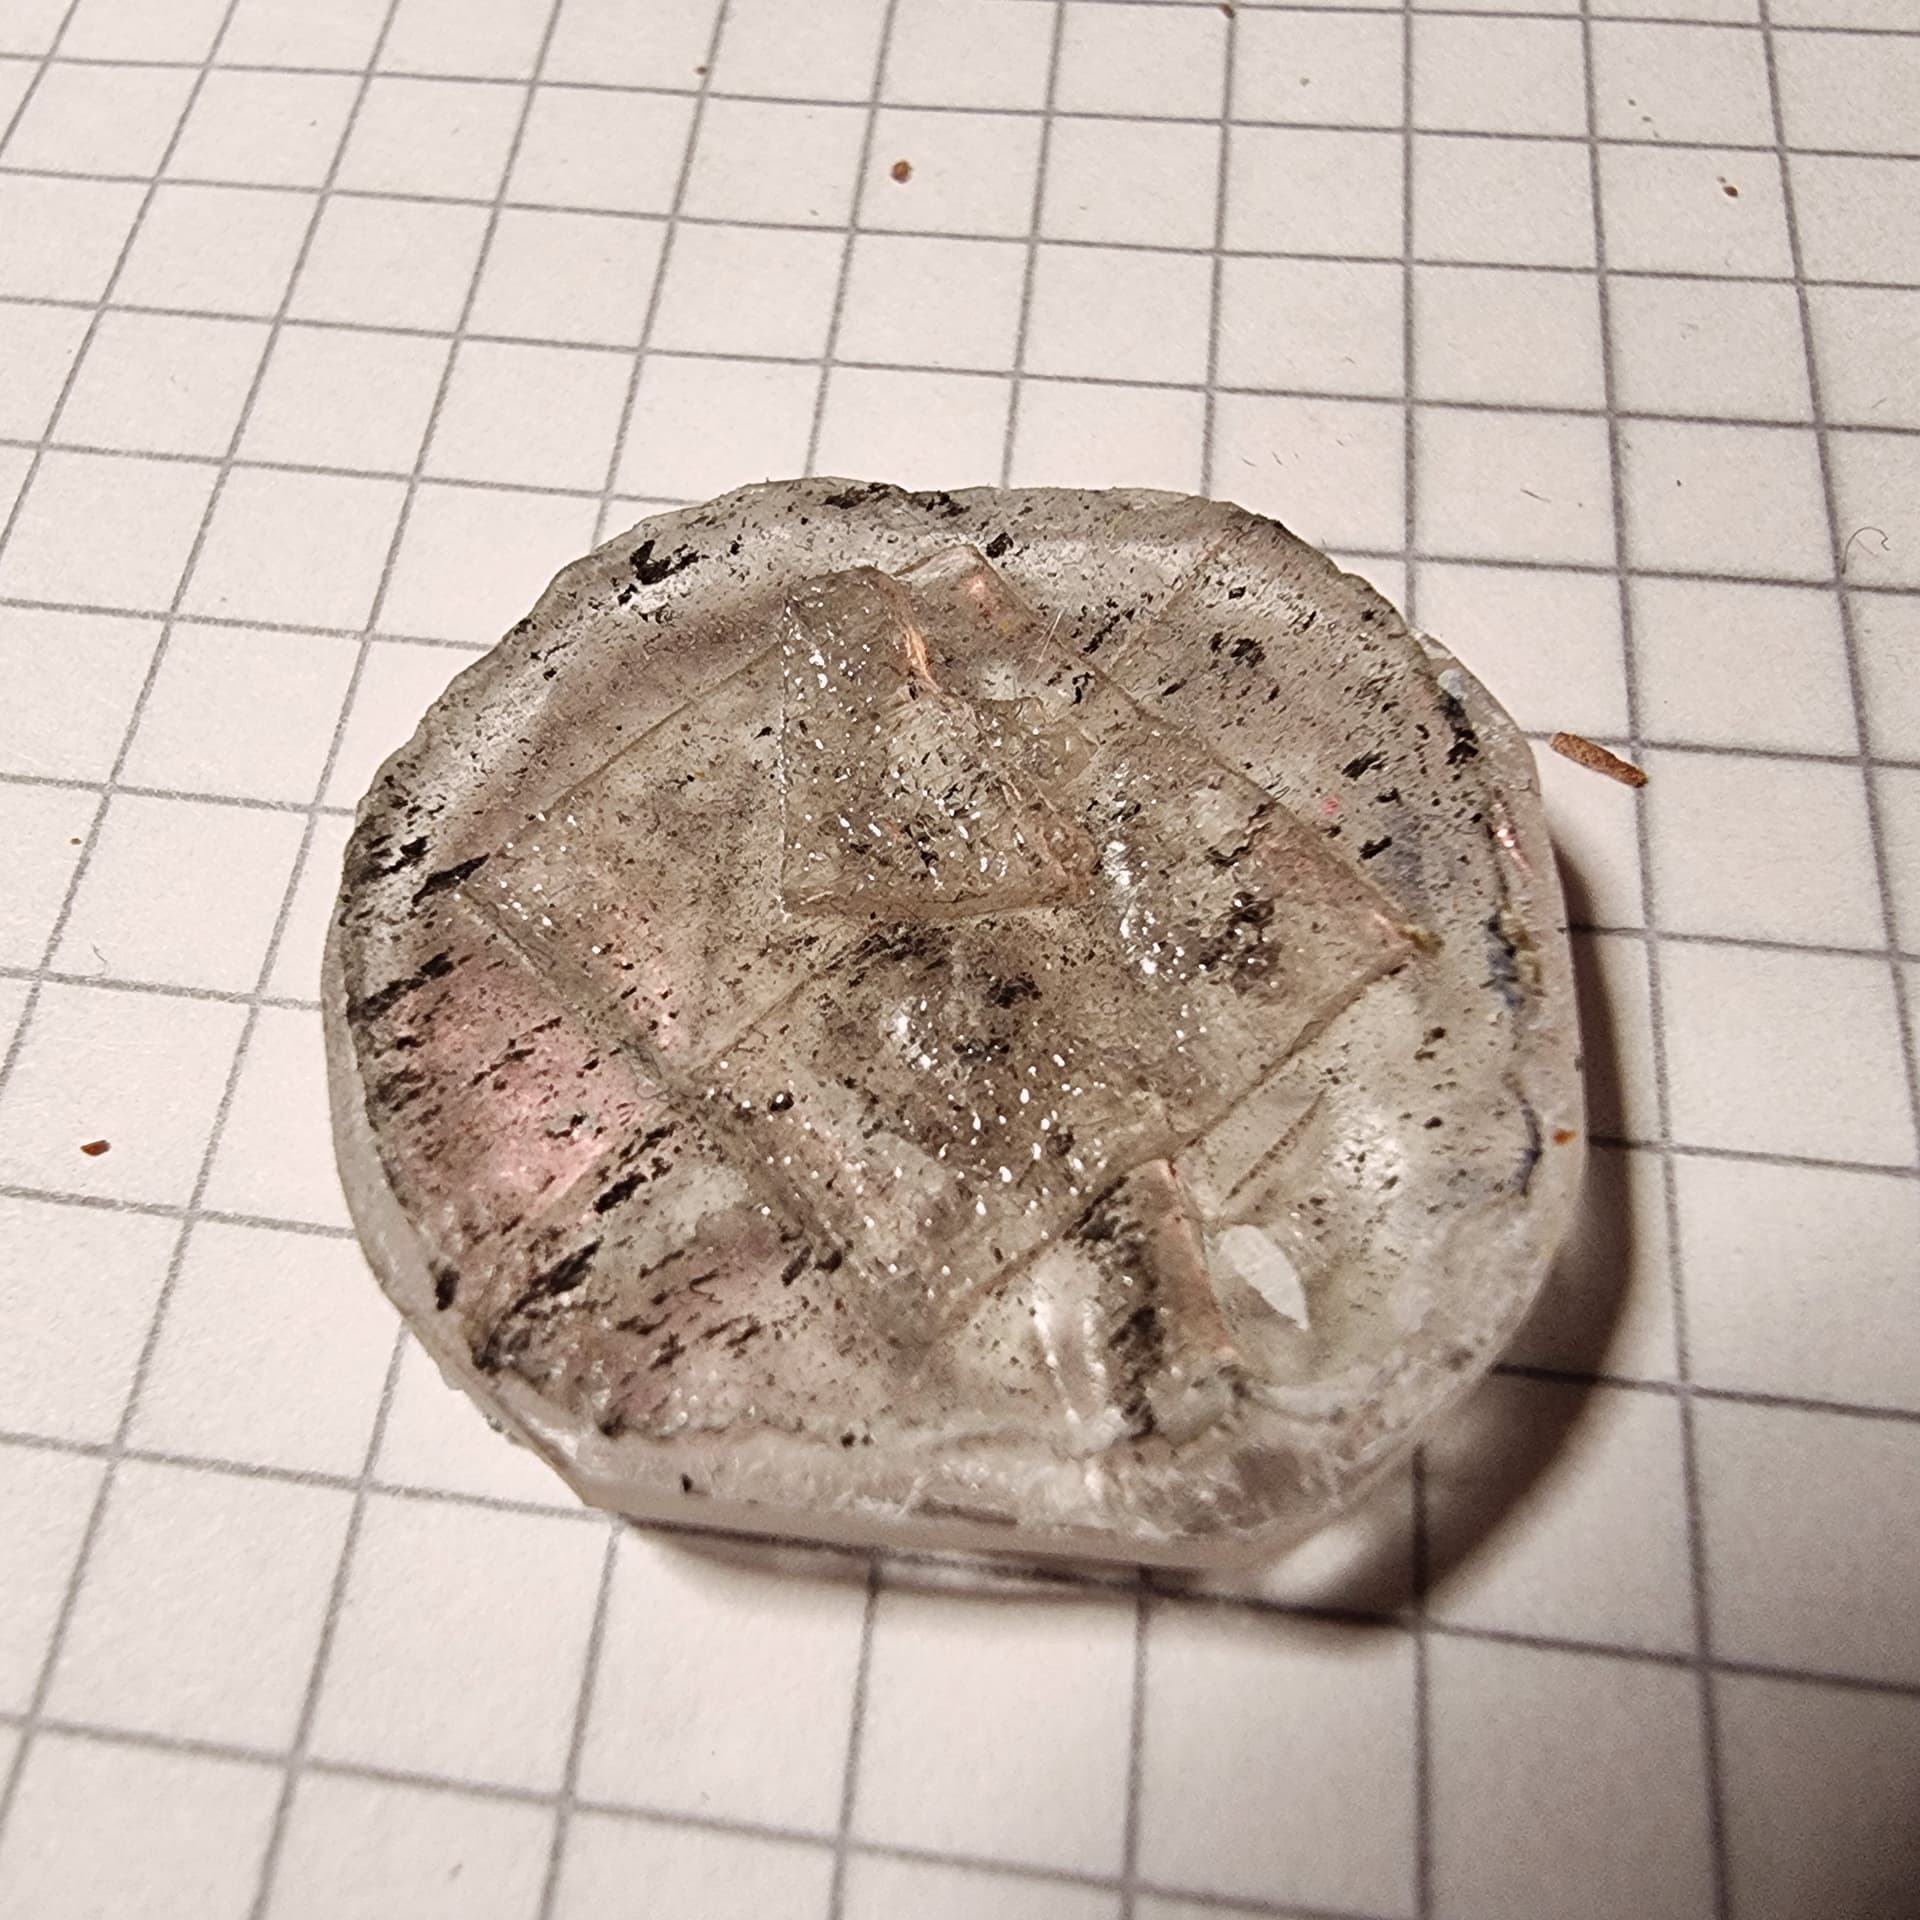
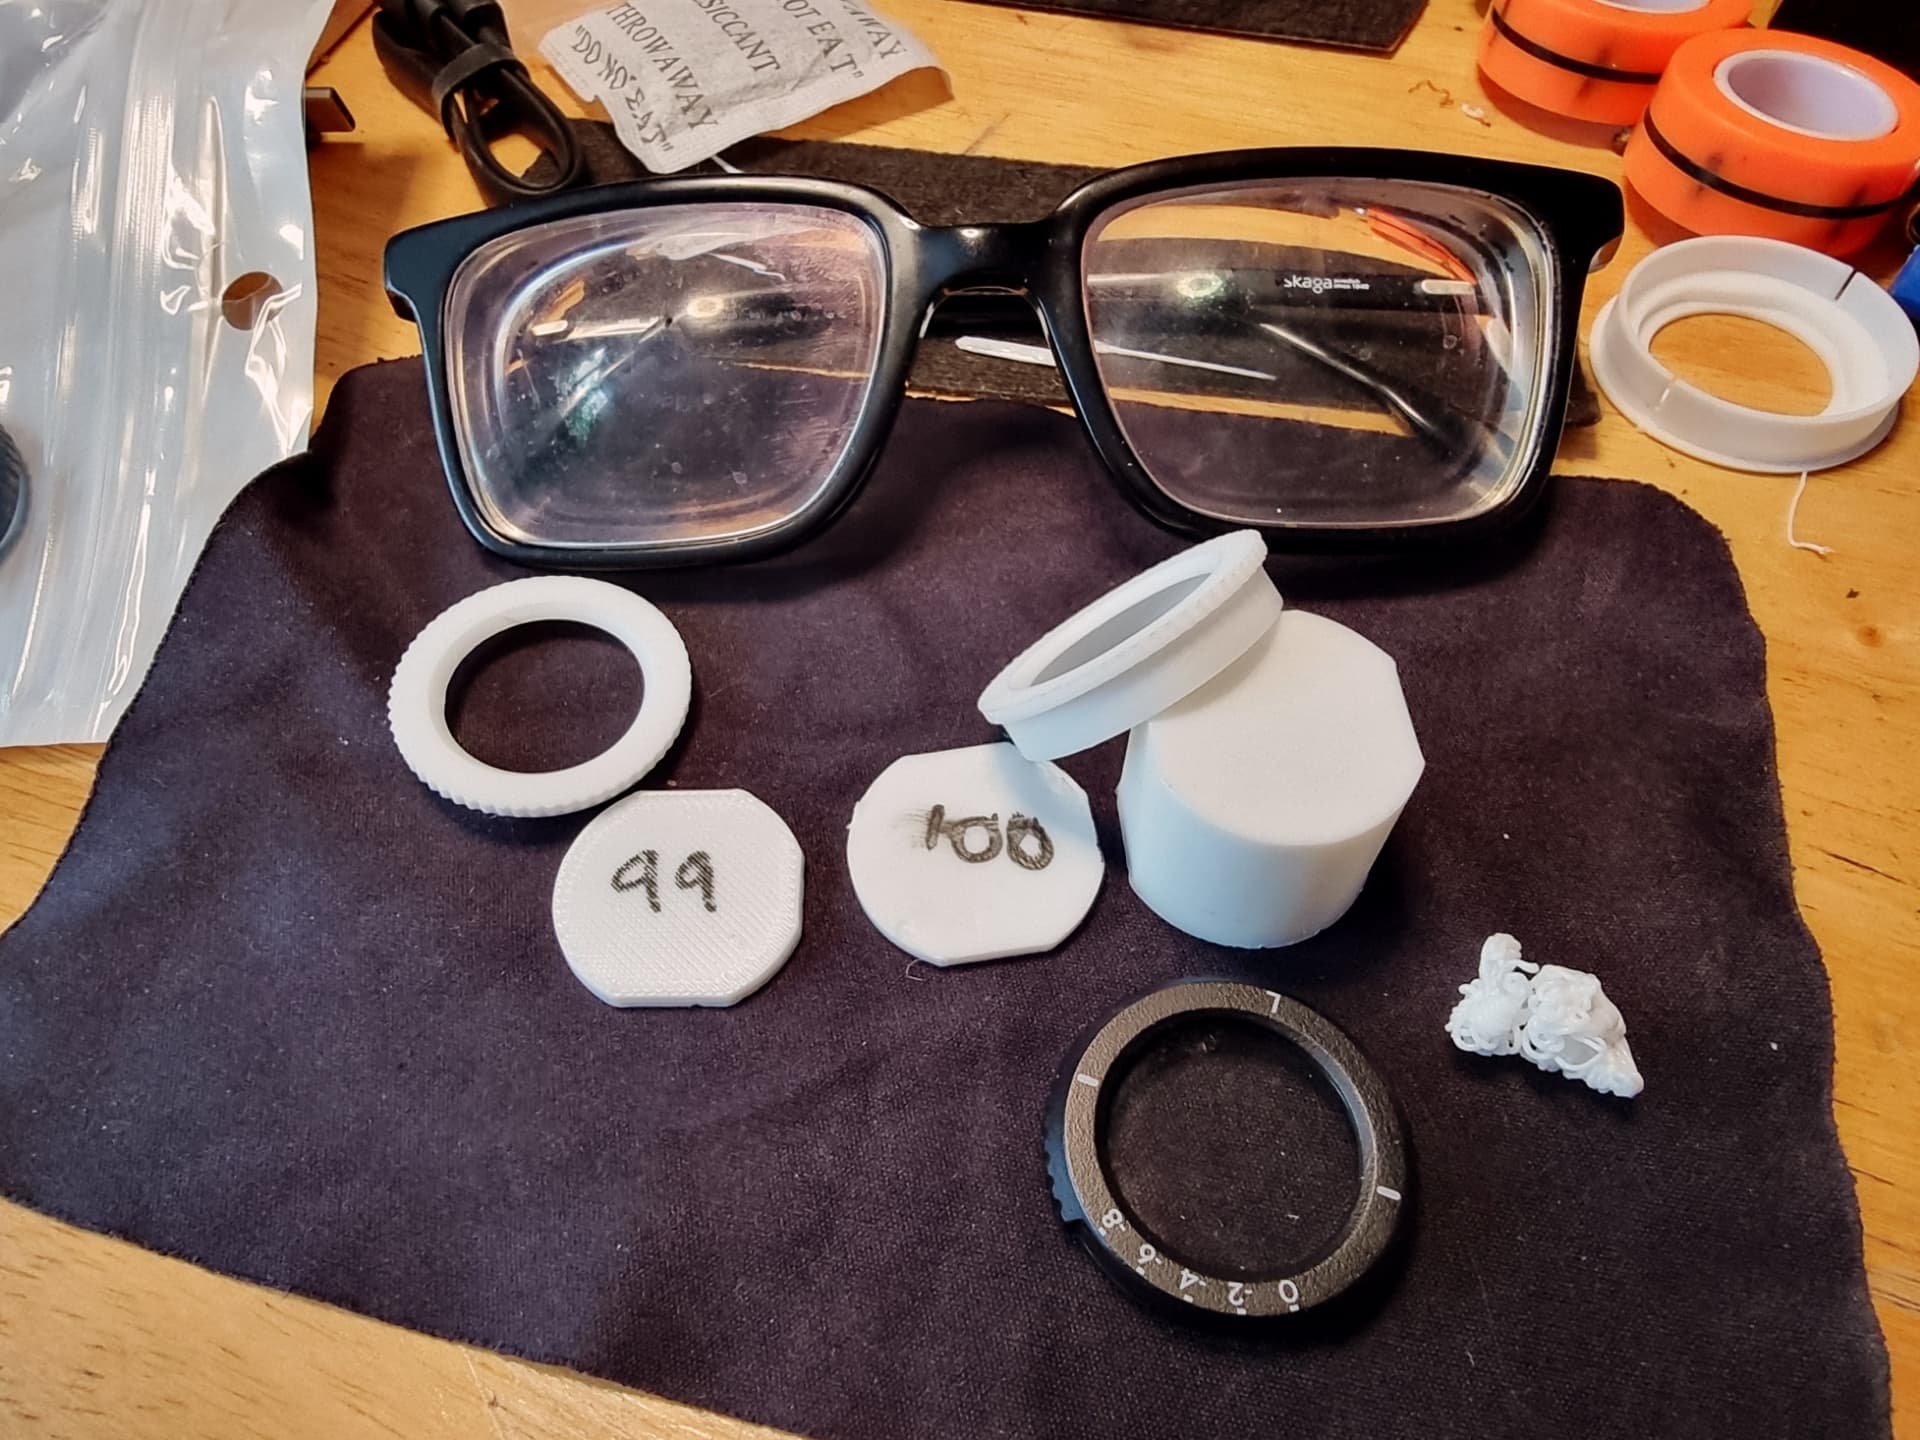
I started off by modelling and printing opaque lens blanks so I don’t have to keep touching the DJI lenses. Despite being little plastic things, they’re optically good and even have proper coatings, so they deserve some respect.

I then extruded the lens blank to make a thick block, which I’ll use in the final shaping stages of the grinding.

I then disappeared down a rabbit hole to determine exactly how I’m going to machine my lenses.
They’re polycarbonate, which has a bad rep for fracturing and melting, but I’ve found the optical grade variety very forgiving. I made my previous lenses with just a handheld multitool with a sanding pad. These lenses are tiny, so I’ll have to step up the precision.

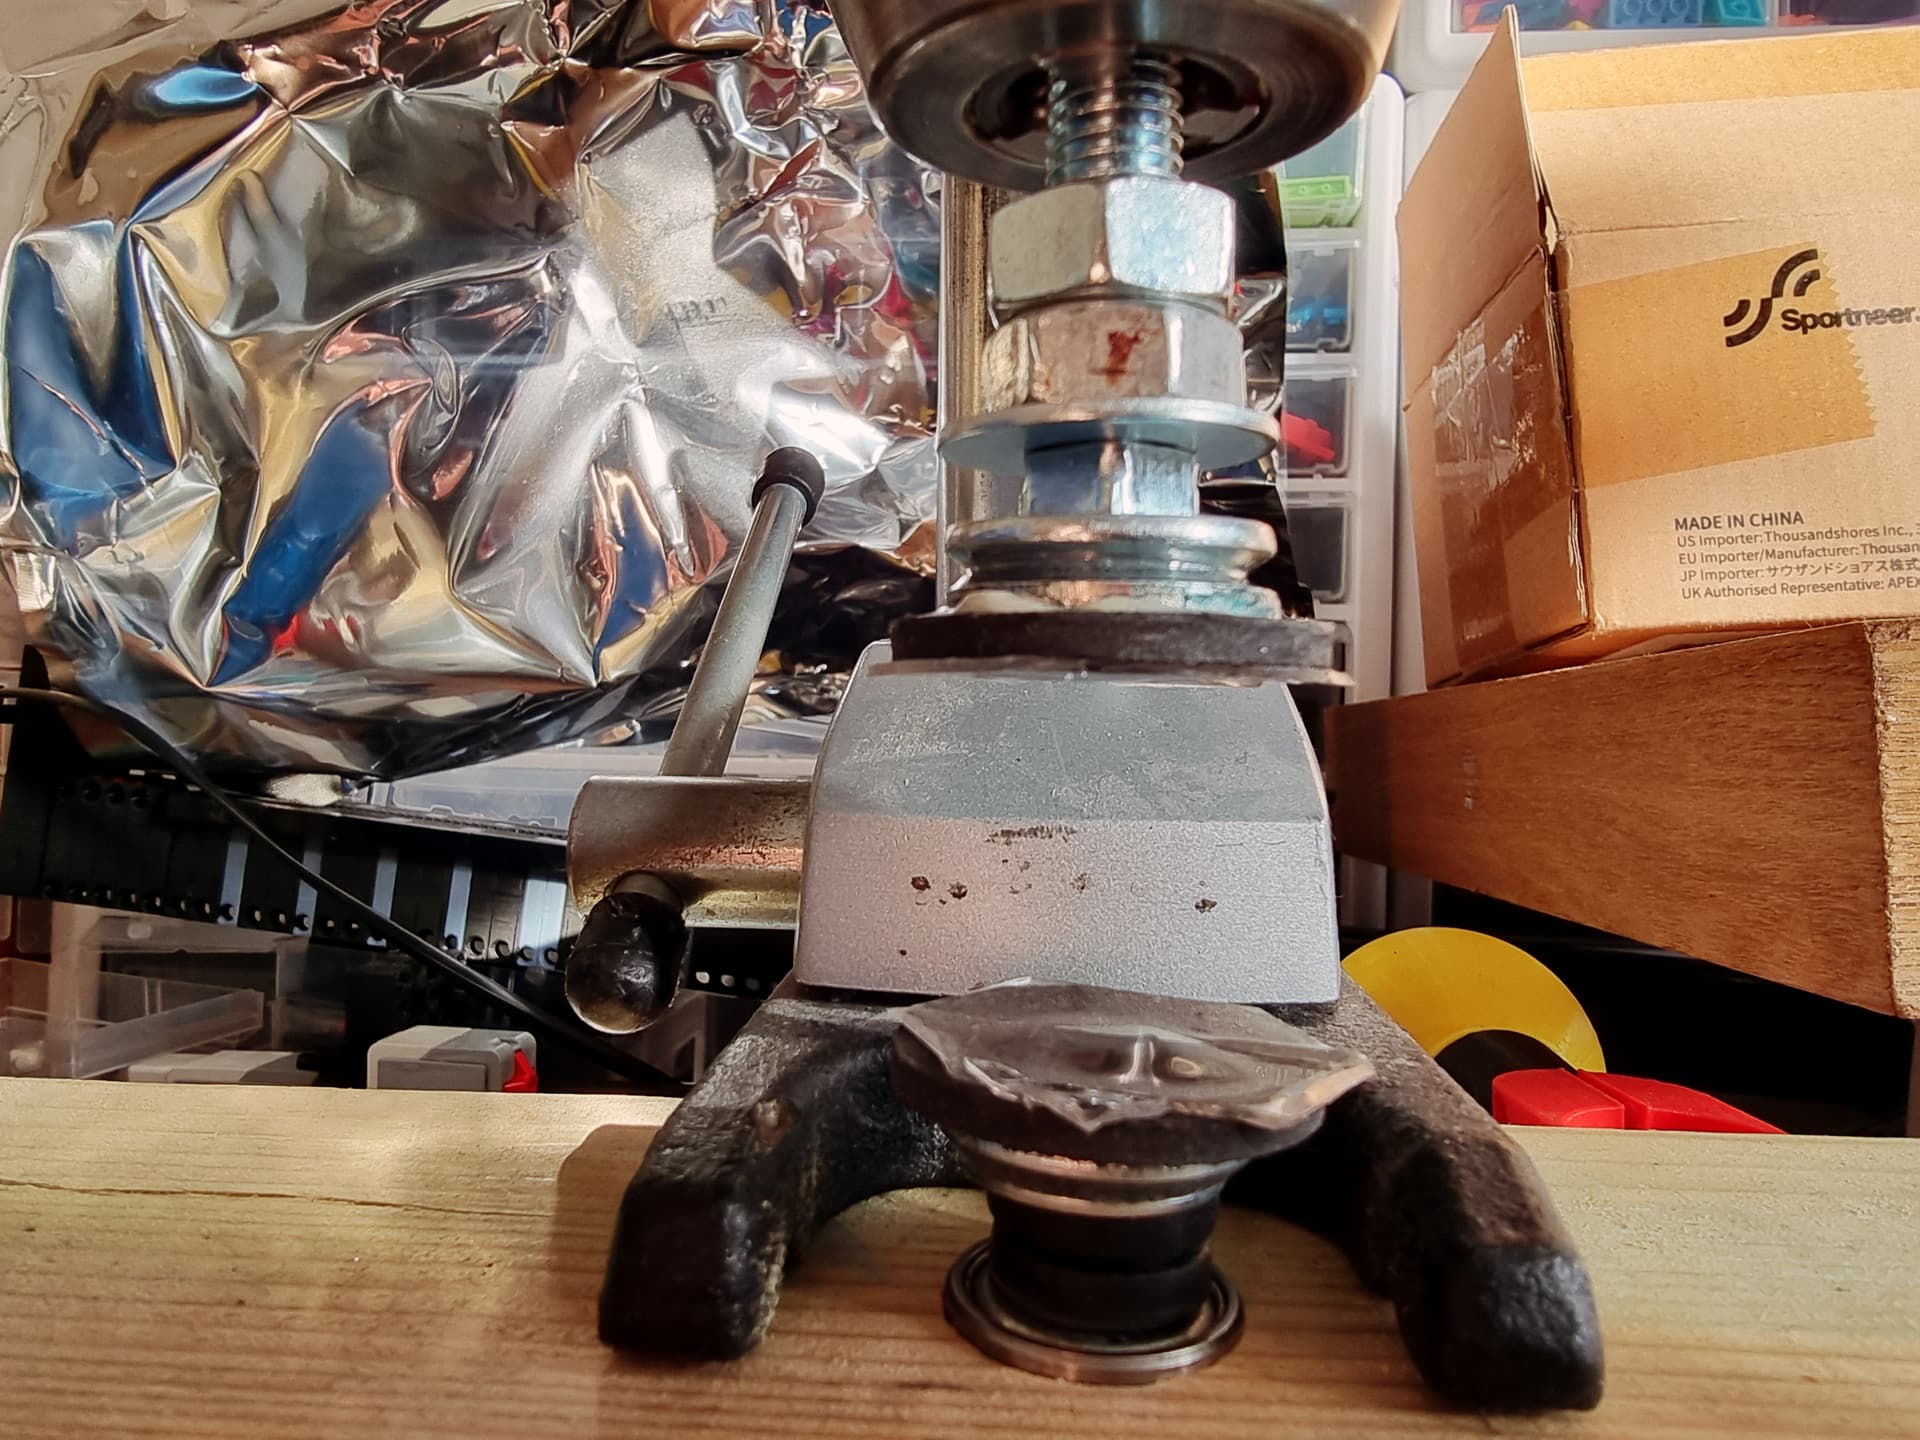
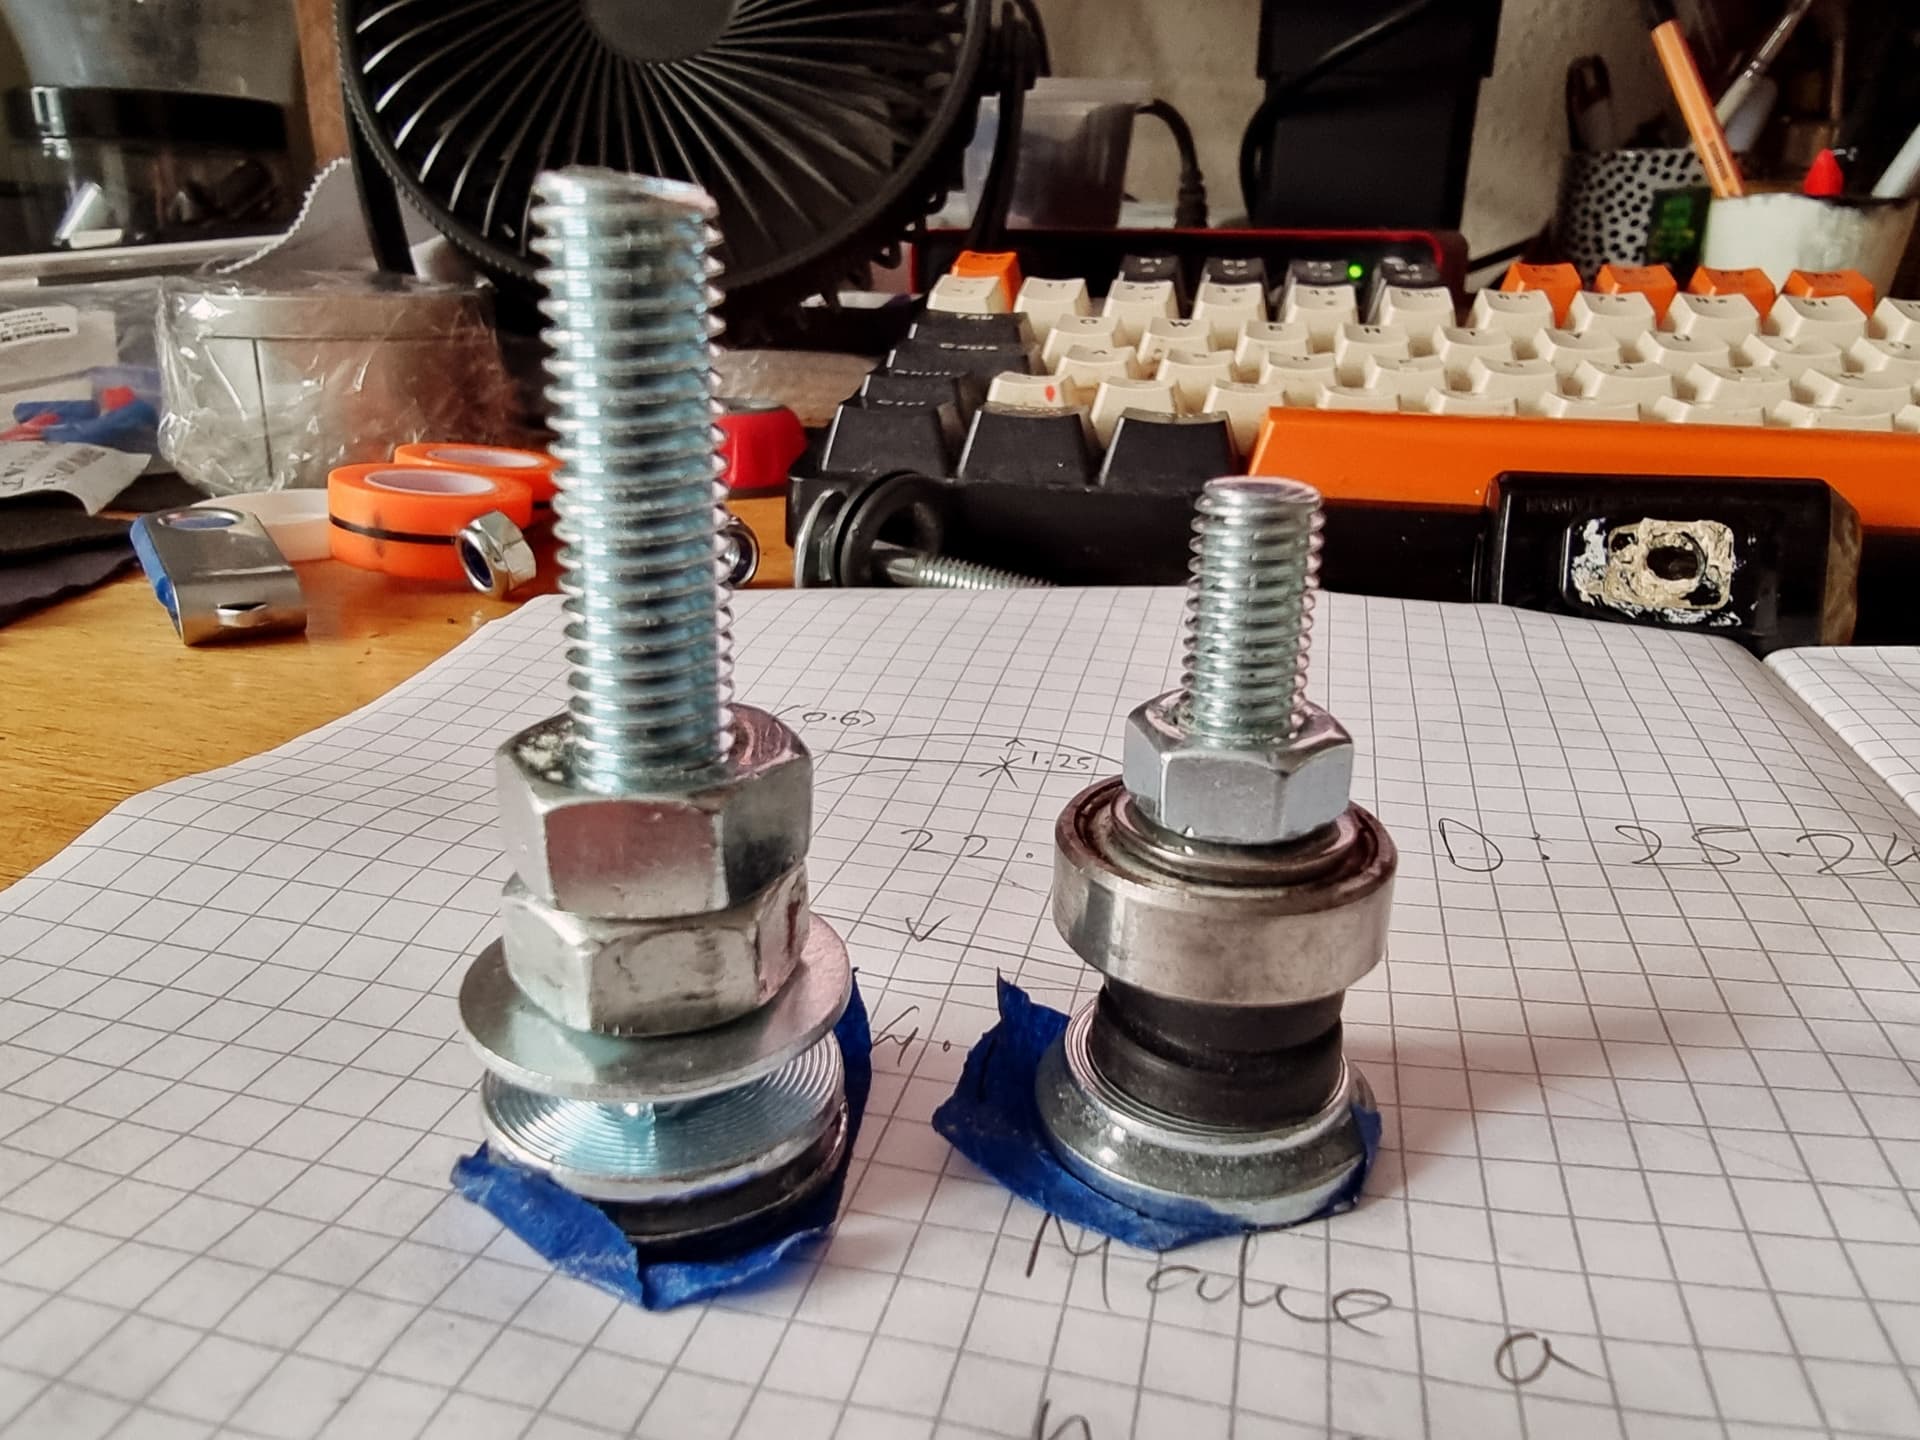
I glued washers to some carriage bolts in the drill press to get them perfectly level.
The next stage will be to add rubber pads to grip the lenses.
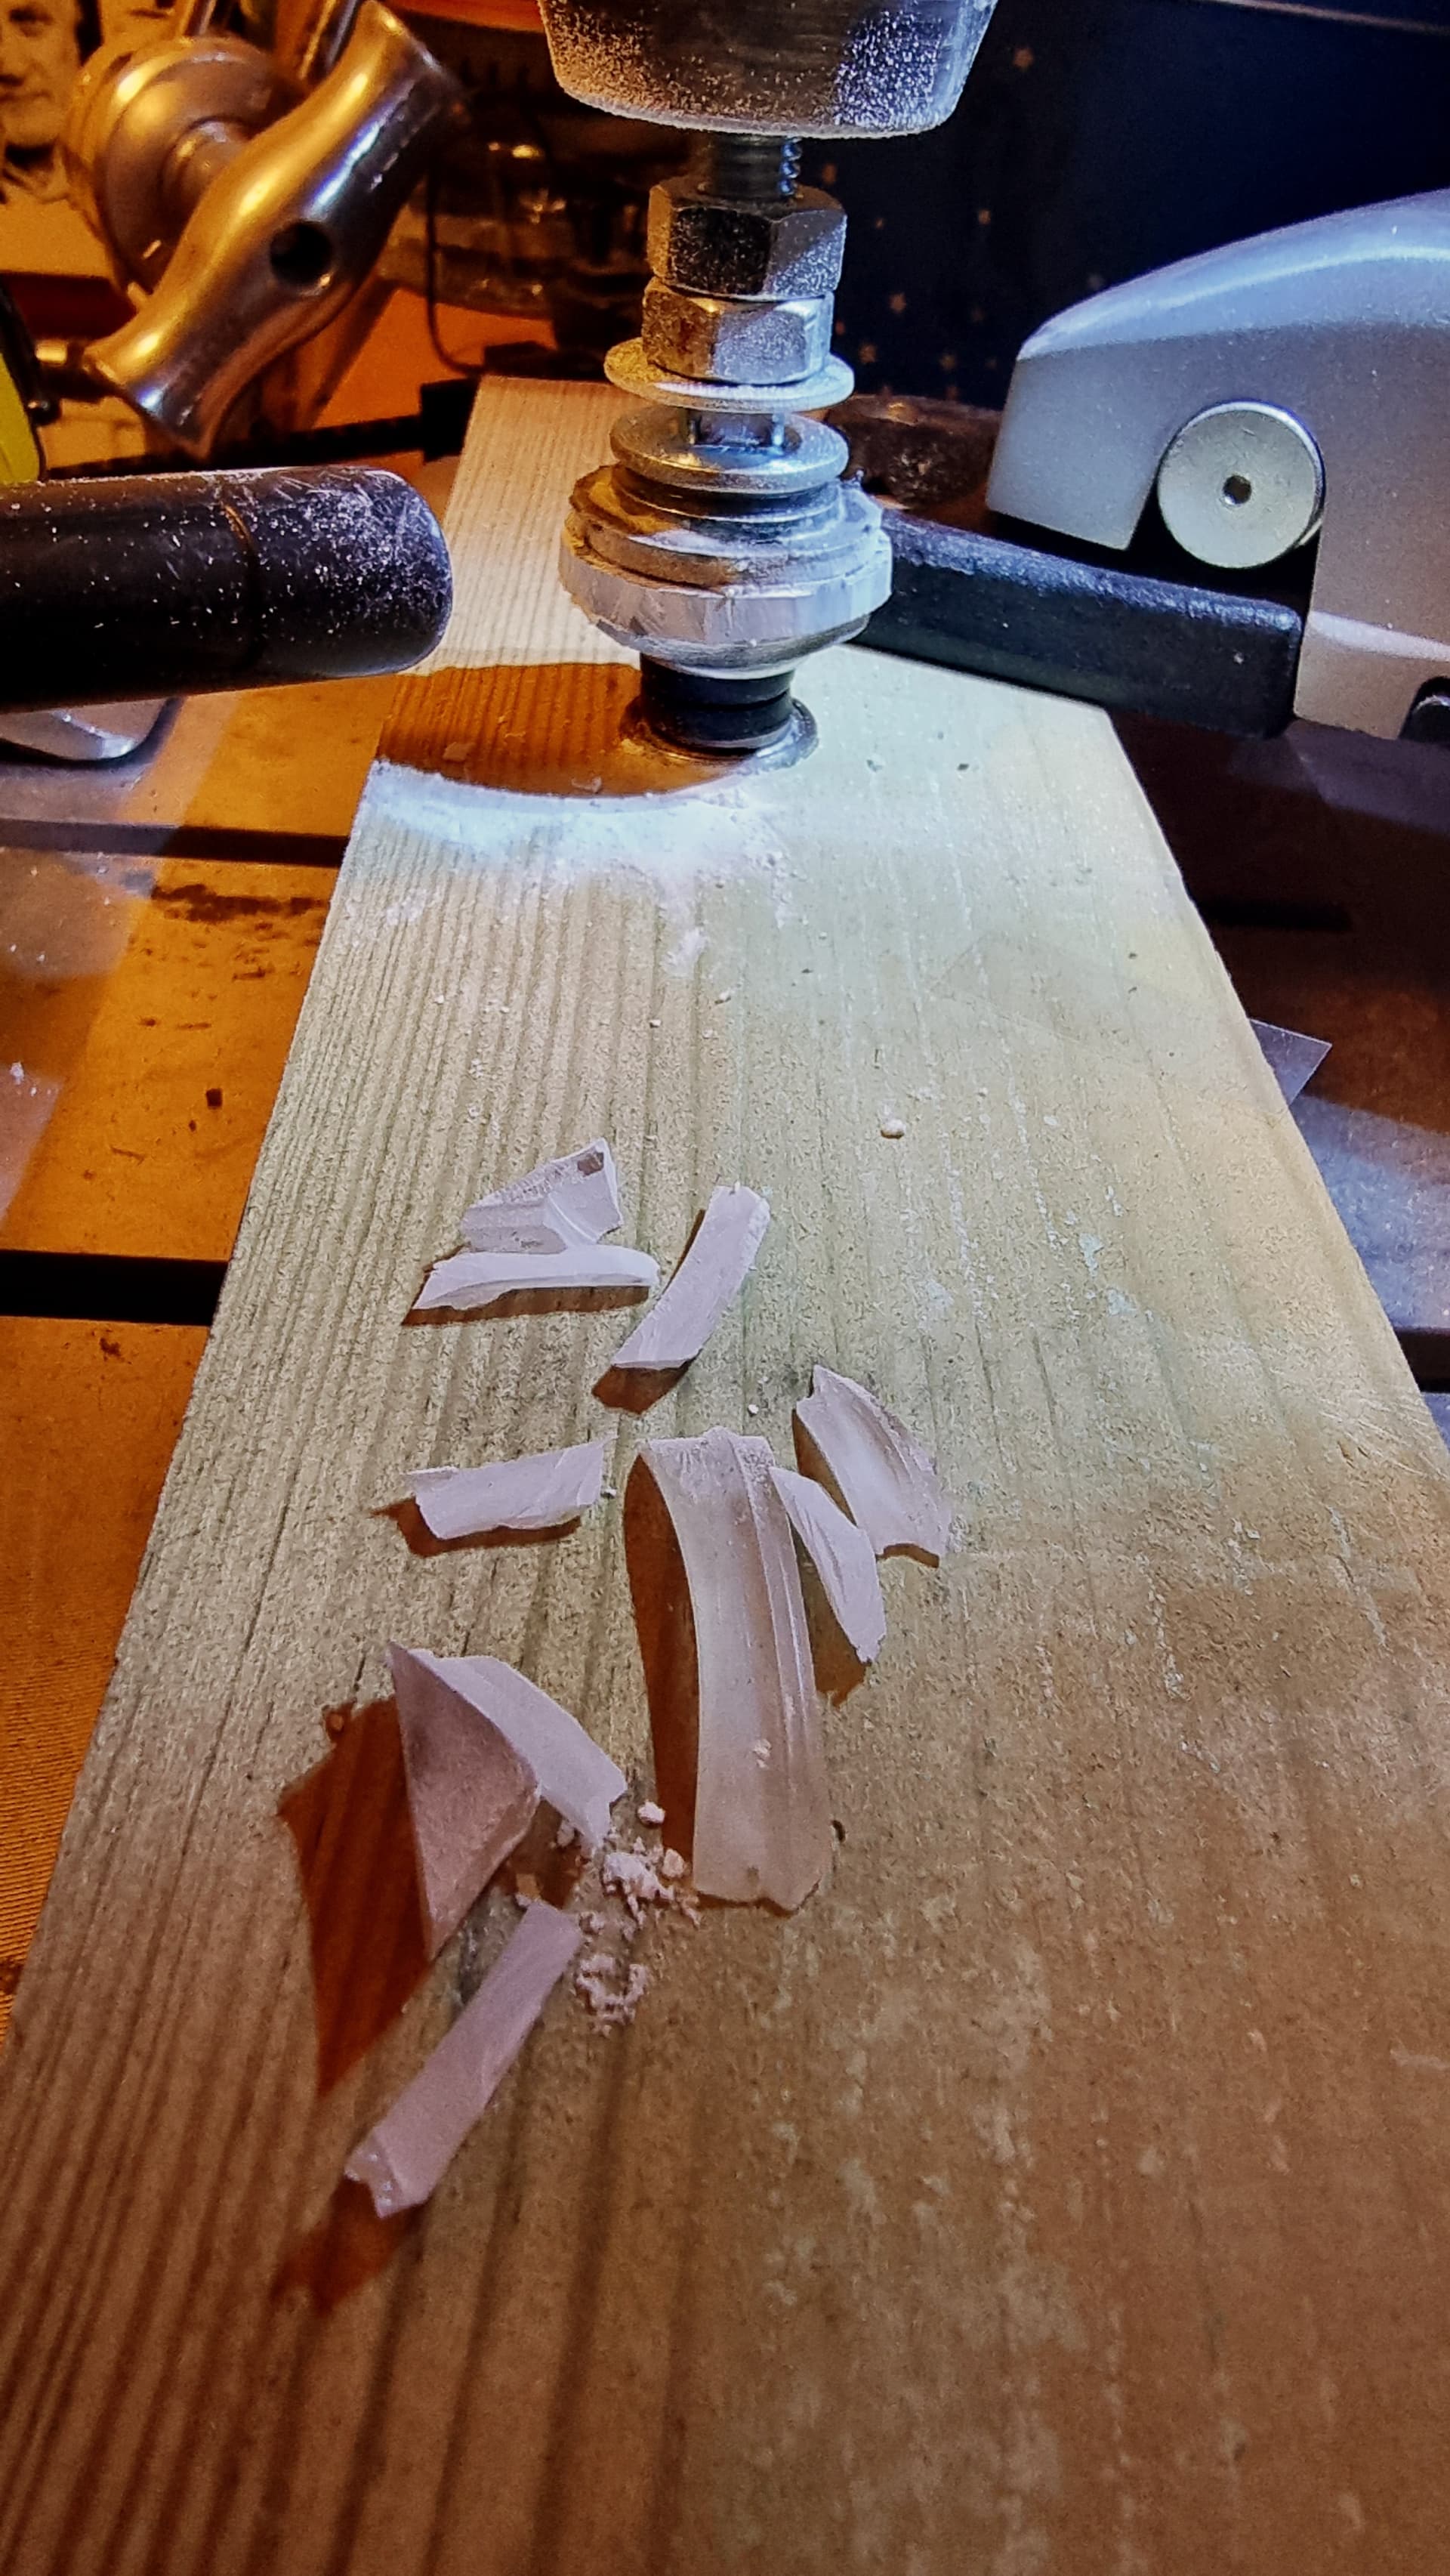
The plan is to use the drill press as a vice while I chop away the excess polycarbonate and then spin and gently cool-grind the lens into a round shape with 25mm diameter.
One of the bolts has a skateboard bearing and will be inserted into a block of wood so it can spin with the drill. This all took a couple of days as I only had slow cure epoxy and had to wait for the perfect sized forstner bit to be delivered to drill the bearing mounting.

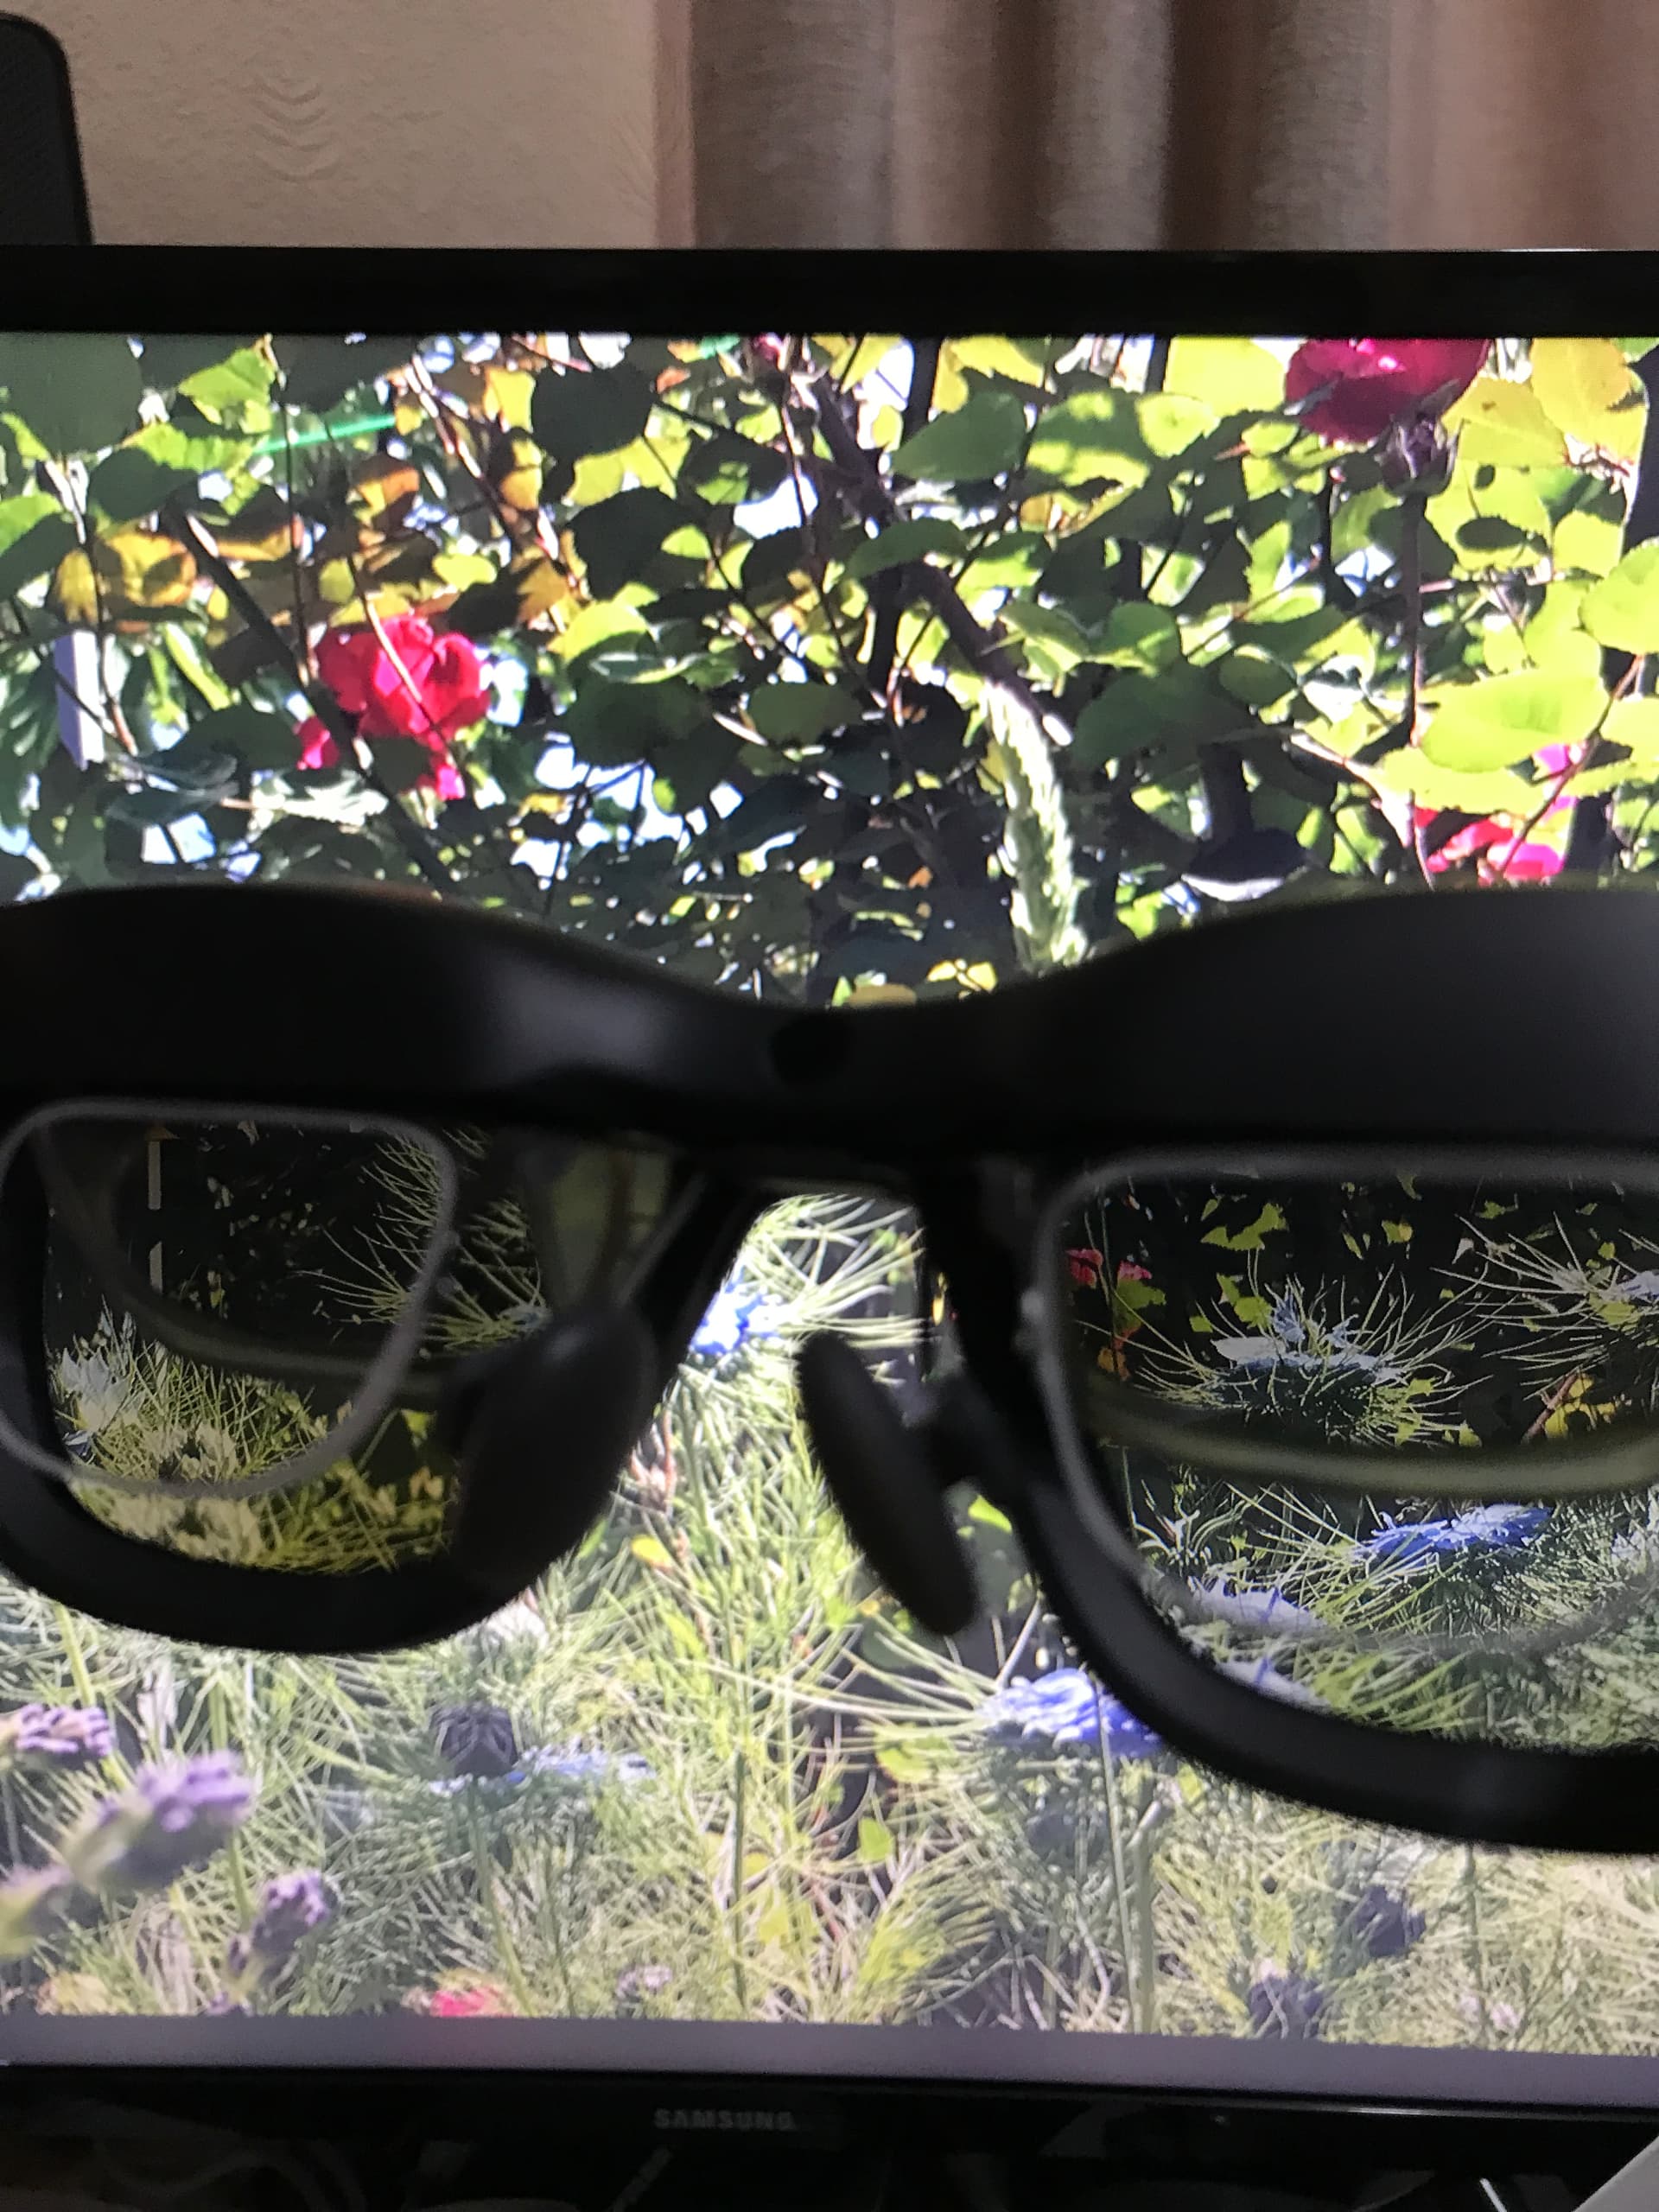
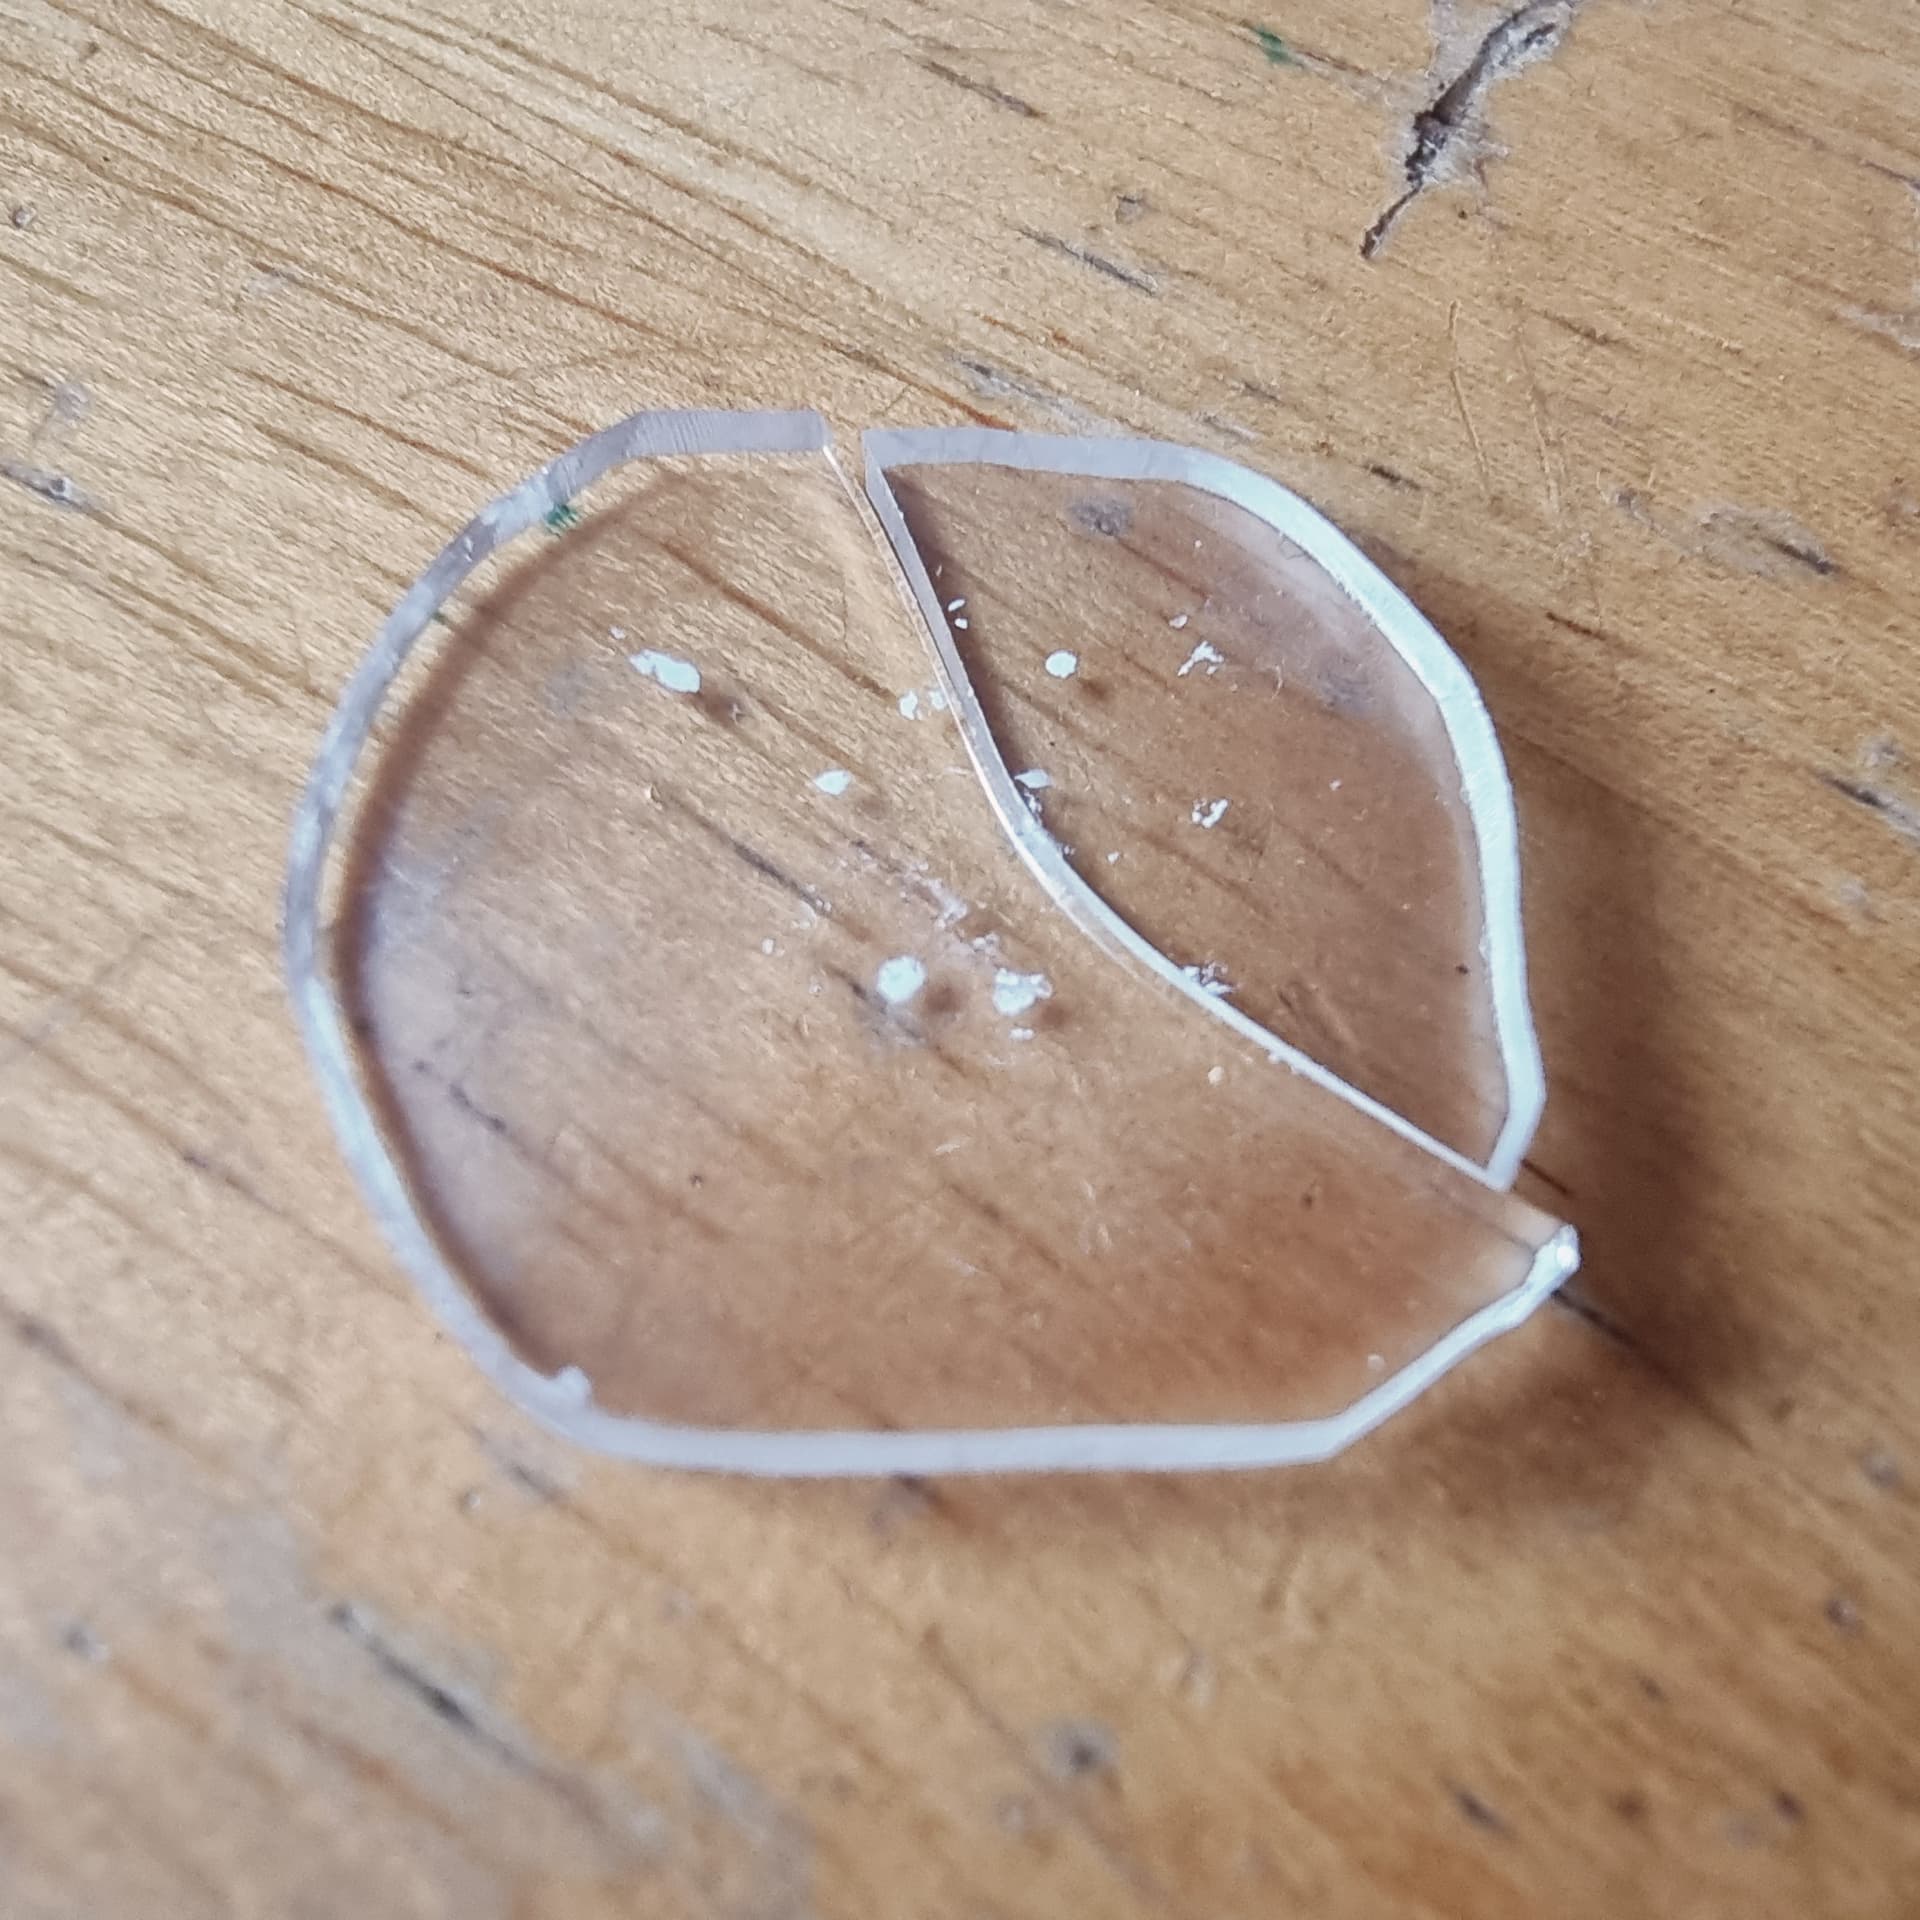
Meantime, I put on the old glasses and marked the optical centres with an acrylic pen (permanent markers don’t work on coated lenses).

The next tooling stage will be to mount the lens on the lens-shaped block somehow. Opticians use sticky pads that don’t leave a residue on the lens for this.

I’ll have to improvise. I’ll probably use a rubber-padded g-clamp to hold the lens while I grind it with different grades of sanding drum into its final shape.

Bevelling the lens will be tricky but I think I can just 3d print a jig for it. Will think more about that once the lens shaping has progressed.

In the meantime I’ve been working on the final stage - the framing.
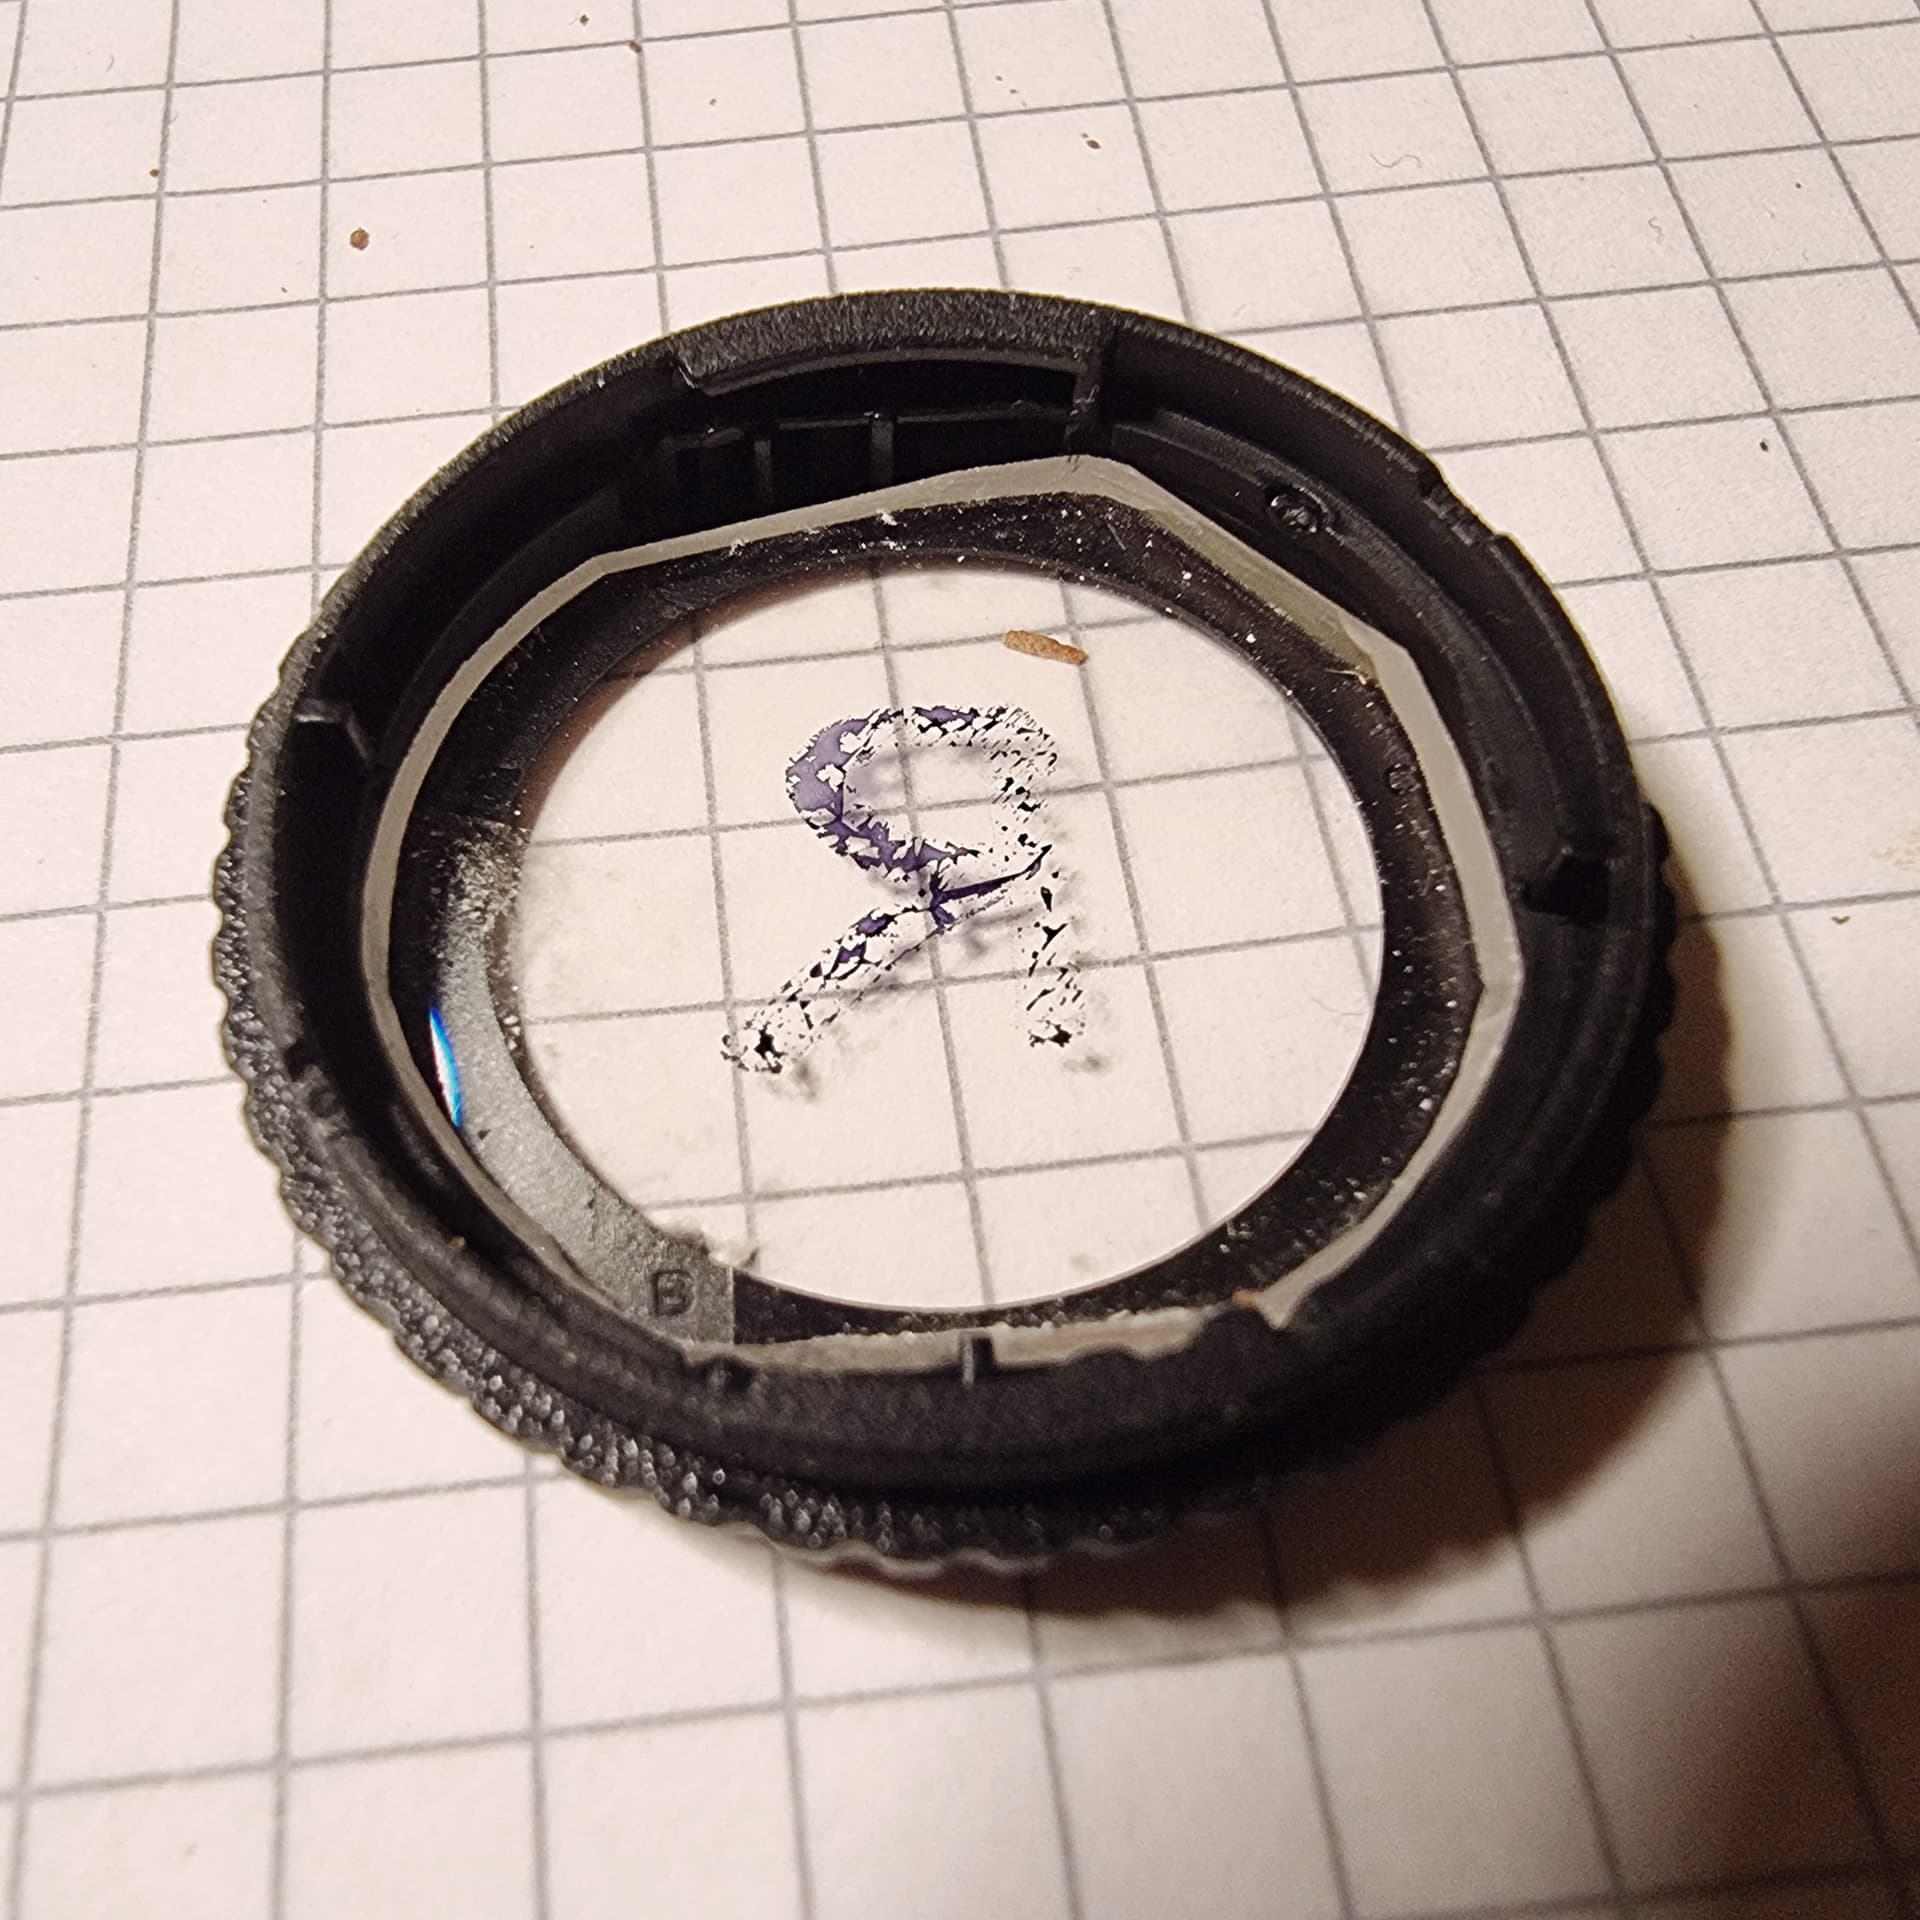
I scoured the 3d modelling sites for a model of the plastic DJI eyepiece.
I found two, each of which models some parts of the eyepiece but neither is up to the job.
I then spent a day learning Design X so I could convert the STLs of these models into NURBS because I’m not good with meshes in CAD. That’s time I’ll never get back. Design X didn’t want to cooperate and never explained what I did wrong. Looks like I need to RTFM for Rhino 6 mesh tools which I should have done in the first place. All this was because meshes look very complex in CAD and it’s a headache cutting out geometry for a remix.

Finally, I’ll have to address the problem that the lenses will be much closer to my eyes than the DJI ones, which will lead to eyelash streaks smearing the glass. Fortunately there are off-the-shelf solutions like thicker face and forehead pads which are on order, and meanwhile I can use 3D printed versions. Or I can shave off my eyelashes with the dog trimmer.

That was most of my weekend and I’ve so far only spent £5 on a 22mm forstner bit.
Prescription lens inserts start at $75 but nobody makes them in my prescription.
It’s possible to set the dioptre adjustment on the Goggles to -6 and knock that off the insert prescription. But why do that when you can DIY and learn something along the way?

2 Likes

What an interesting project - i’ll be following with interest!

2 Likes

Love the creativity!

1 Like

Wow, that’s some work there, been there years ago but not to the point of grinding the lenses, just trimming them down to size.
I’ve now got the XREAL glasses that plug into the Dji RC-2 for a heads up display.
The company ask for your prescription which they then cut the lenses to whatever size you request.
I went for the glasses option..
Here

3 Likes

I’ve made some decisions about where to go next.
The frame is crucial for astigmatism because it locks the lens into a fixed orientation so the extra curves in the lens that adjust for astigmatism match perfectly with the aspherical parts of the eye and don’t move around. Neither of my frame STLs do this.
I think editing together two different STLs of lens frame designs is going to take me too long. It was worth exploring that option because I’ve learned a lot about meshes and have a few new specialised apps to handle this in future.

I looked into scanning the original DJI frames. The problem is they’re really small, shiny and black, which is a problem for consumer scanners and photogrammetry, which would send me down a deep rabbit hole. There are also occluded parts which would be hard to scan.
Instead, I’ve been looking into the feasibility of bevelling the lenses to fit the DJI frames. How hard can it be? With wood this would be a quick job for a router. On this tiny scale I could probably manage it with a Dremel and I was lucky to find an STL on Printables.com for a small routing table that has a fence with a 6mm throat and fine adjustment for bit height (photo above). I have a Dremel clone that can go down to 10,000rpm, so that should hopefully remove stock from the lens without overheating and melting. I’ll practice technique with some acrylic offcuts and I’ll probably need to make a quick jig to hold the lens for tooling.
Meantime, I found that you can now get residue-free double sided gel tape, which will make it much easier to mount the lenses for grinding.
I’m still making the rubber pads for the rotary grinding clamp. My sheet rubber stock was a skip salvage and unfortunately it comes coated with a really, really persistent, rubbery adhesive coating. Not wanting to shell out £12 for a bottle of GooGone, I’ve put the pads in the freezer, which apparently makes the coating less viscous and easier to remove.
Now that I’ve found the gel tape, I might be able to forego the rubber pads, but I’ll persevere with those since I’m worried about crushing the lenses.

Spend is now at £9.

1 Like

Much progress of late?

1 Like

I’ve had to deal with some condensation spots going mouldy in the flat, so that’s taken me away from this project.
Here’s a photo of my assembled lens tooling jig, with rubber pads and no-residue double sided gel tape. This will serve as my lens holder as I remove the majority of the polycarbonate. I’ll then spin the lens at 200rpm and smooth it down to the right diameter before cutting the edges to fit the DJI lens mount.
This bit is scary, but fortunately I found an old lens on the floor of my workshop that I will use for a practice run.

1 Like

First of my lenses cut down to a workable size.
I think I will skip this step with the other one and go straight to grinding. It seems much faster to remove polycarbonate that way and the process can be done with water. I Couldn’t do that with this setup and the smell of pc dust lingers much longer than acrylic. And it is far more sinister.


So clamping with a drill press turned out to be a terrible idea. The lens cracked under the pressure!
I’ve switched to G clamps, which give more of a feel for the clamping pressure, and adding more padding on the concave side of the lens. In the second photo you can see both lenses after machining with the dremel diamond saw.

At this stage I only have one right eye lens left so I’d better get it right.